Showing posts with label Android Updates. Show all posts

Tuesday, May 15, 2012

How to Update Motorola Defy Plus with Stable ICS v4.0.4 Firmware


Earlier, Motorola had announced, Motorola Defy Plus will stuck on Android Gingerbread v2.3. Since then many of the Motorola Defy Plus users are looking for third party developers to launch Latest Android ICS v4.0 for their smartphone. Now the wait seems to be over, Defy owners can now upgrade to Android ICS v4.0 with Stable ICS v4.0.4 Firmware. Because, it is not an official update launch by Motorola so, you have to root your device first which will void warranty of your device. But all the rooting access will be revoked after updating the device with any official update. Before proceeding to installation process, read all its features first and then follow the pre-requisites.
Features Included in Stable ICS v4.0.4
  • Camera Panorama
  • Chrome
  • Face Detection
  • Network Usage Stat
Pre-Requisites
  • It is highly recommended to backup all your data in SD Card before applying changes. Because there are full chances of data damage and corrupt. Use Astro File Manager to back up.
  • Disable all Firewall/Anti-virus apps installed on your device.
  • Charge your device upto 60% to avoid from unexpected shutdown of the device during the installation process.
  • Enable USB Debugging Mode on your device through SettingsàApplicationsàDevelopmentàUSB Debugging.
Disclaimer:-Neither we nor the developers are responsible for any mis-happen to your Android phone. Try it at your risk.

How to Update Motorola Defy Plus with Stable ICS v4.0.4 Firmware
  • First of all, download Stable ICS v4.0.4 Package and GoogleApps in your computer.
  • Now connect your device with computer and move both the downloaded zip files in the root folder of your device.
  • After it, switch off your phone and enter in Recovery mode. To enter in Recovery Mode, Press and hold the Volume Down key and press Power button.
  • Now once you are in Recovery Mode, select Install Zip from SD CardàChoose Zip from SD Card and then select downloaded ICS package. Press Power button to confirm it.
  • Once device is updated successfully, now you have to select ++++Go Back++++ and then Reboot System Now. It will take longer time than the normal start up time to display home screen. If it doesn’t starts within 5 minutes then try it by re-inserting the battery.
Note:- If any problem occurs during the updating process then start the process by reinserting the battery in it.

That’s it! Now you have successfully updates your Motorola Defy Plus device with Stable ICS v4.0.4 Firmware. If you face any issues during the installation process then mention it in the comments section and also share your reviews about the article.
read more...

Monday, May 14, 2012

How to Update Motorola Razr with Eclipse Custom ROM Firmware


Earlier, I wrote an article to Update Motorola Cliq 2 with AndroidGingerbread, this time Motorola Droid Razr has got new Eclipse Custom ROM update which has tons of features. It is not an official launch from Motorola side. Eclipse Team has come up with this update for Motorola Razr smartphone. Eclipse Custom ROM comes with tons of new features with great UI and speed. Remember, you must have to root your Motorola device to install Eclipse ROM on it.
Key Features of Eclipse Custom ROM Firmware
  • Gingerbread 2.3.6 Firmware
  • Deodexed
  • Zipaligned
  • Bloat Removed
  • A lot of blur has been removed
  • AOSP/CM7 mms
  • AOSP music
  • AOSP gallery3D
  • Eclipse Launcher2
  • CM7 file manager
  • AOSP/CM7 Email
  • AOSP/CM7 alarm clock
  • AOSP car/desk dock
  • AOSP news & weather
  • AOSP calendar
  • AOSP Sound Recorder
  • Custom Blur Camera
  • DSP Manager
  • Eclipse Parts
  • Accurate Battery – 1%
  • CRT Animation ON and OFF
  • Misc prop edits
  • Custom Host File
  • GPS config changes
  • App widget Picker – boombuler
  • Download crutch to help with web downloads
  • Busy Box
  • init.d support
  • Eclipse Wallpaper
  • Custom blue theme throughout
  • ICS clock widget
  • ICS Inspired boot animation
  • Inverted Contacts/Dialer
  • Inverted Google Talk2
  • All Settings menus are inverted
  • 7 pull down toggles (wireless, blue tooth, gps, sound/vibrate, auto brightness, data, and rotation)
  • Native Facebook for android contacts sync
  • Wake on volume
  • Extended power controls (reboot, recovery, screenshot)
Disclaimer:-Neither we nor the developers are responsible for any mis-happen to your Android phone. Try it at your risk.

Pre-Requisites
  • Back up of all your data in SD Card using Astro File Manager because during the installing process you may lose your data.
  • Disable all Firewall/Anti-virus apps installed on your device.
  • Your device must be charge upto 60% to avoid from unexpected shutdown during the installation.
  • Enable USB Debugging Mode, head to SettingsàApplicationsàDevelopmentàUSB Debugging.
How to Update Motorola Razr with Eclipse Custom ROM Firmware
  • First of all, download Eclipse Custom ROM Firmware Package in your computer.
  • Now connect your device with computer and move the downloaded package in the root folder of the SD Card and then switch off your Motorola device to get into Recovery Mode.
  • To enter in Recovery Mode, press both the Volume Keys simultaneously and holding these button press Power button. Now in Boot Mode section, select Recovery option from it.
  • Now if your device says Safe System is Disabled then Enable it by navigating Safe BootàToogle Sage System and then Yes. If it doesn’t show such message then skip it.
  • Once you are in Recovery Mode, Go BackàWipe Data Factory ResetàWipe Cache PartitionàMounts and StorageàFormat/Systemà++++Go Back++++ to choose AdvancedàWipe Dalvik Cacheà++++Go Back++++.
  • Once its done, select Install Zip from SD CardàChoose Zip from SD Card and then select moved Eclipse Package. Now it will take 5-10 minutes to complete the process.
  • On the successful completion of update, you will be again in Recovery Mode. Select ++++Go Back++++ and then Reboot System Now.
Note:- If any problem occurs during the updating process then start the process by reinserting the battery in it.

That’s it! Now you have successfully updates your Motorola Razr device with Eclipse Custom ROM Firmware. If you face any issues during the installation process then mention it in the comments section and also share your reviews about the article.
read more...

Sunday, May 13, 2012

How to Update HTC One S with Bravia Engine Onyx Custom ROM Firmware


HTC One S has blessed with Sony Bravia Engine Onyx Custom ROM Firmware. Many of the users were waiting for this update. It is not an official update launch by HTC so you have to root your HTC One device first. Onyx Custom ROM has been developed to improve performance and stability of the smartphone. It also shows all your photos and videos in high quality. Below is the screenshot of the newly updates HTC One S Bravia Engine Onyx Custom ROM Firmware.
Features of Onyx Custom ROM Firmware
  • Android 4.0.3 Ice Cream Sandwich
  • Sense 4.0
  • Deodexed
  • Fully zipaligned
  • De-bloated
  • Rooted
  • Stock kernel
  • Optimized for fluid performance and usability
  • Remaped buttons (Long press Home -> Recent apps, Recent apps -> Menu)
  • Disabled onscreen menu
  • Enabled unlock carousel effect
  • Enabled cubic transitions effect
  • Enabled landscape mode Rosie
  • Improved boot.img (Thanks xkonni)
  • Black boot/down animations
  • Fixed Google Play
  • Fixed Wiper
  • Other minor fixes and tweaks
  • Added new kernel
  • Added APM (Advanced Power Menu)
  • Added Volume Wake
  • Added Bravia Engine
  • Extended Quicksettings
Pre-Requisites
  • There are full chances of data damage and corruption, so it is highly recommended to back up of all your data before applying changes. Use AstroFile Manager to back up.
  • Disable all Firewall/Anti-Virus Apps installed on your device.
  • Charge your device upto 60% to avoid from unexpected shutdown.
  • Enable USB Debugging Mode, head to SettingsàApplicationsàDevelopmentàUSB Debugging.

How to Update HTC One S with Bravia Engine Onyx Custom ROM Firmware
  • First of all, download Onyx Custom ROM Firmware package on your computer.
  • Now connect your device with computer and move the downloaded package in root folder of SD Card.
  • Now disconnect your phone and switch it off to enter in Recovery Mode.
  • To enter in Recovery Mode, press Volume Down Key + Centre button and holding both the buttons press Power button. Select Recovery in it.
  • In Recovery Mode, select Install Zip from SD CardàChoose Zip from SD Card and then select Onyx Custom ROM Package.
  • Now it will take 3-4 minutes to apply changes on your phone. Once its done, you will again prompted to Recovery Mode.
  • Select ++++Go Back++++ and then Reboot System Now. It will take sometime to display Home-Screen of your device but if doesn’t starts in 5 minutes try to start it by re-inserting the battery.
Note:- If any problem occurs during the updating process then start the process by reinserting the battery in it.

That’s it! Now you have successfully Updated HTC One S with Sony Bravia Engine Onyx Custom ROM. If have any problem in above mentioned steps then notify us through comments and also share your reviews about this article.
read more...

Friday, May 11, 2012

How to Update HTC Desire with Alex v1.8 Custom ROM Firmware


Bored with existing firmware on HTC Desire? Then Alex V has developed a Alex v1.8 Custom ROM Firmware for HTC Desire users. This is not an official update from HTC but it is based on latest AOSP build which comes with less number of bugs. After applying Alex v1.8 Gingerbread Sense HD ROM on your HTC device, it will change its complete look and feel in terms of functionalities, UI, features etc. Below is the list of all its features.
Features of Alex v1.8 Custom ROM Firmware
  • Ace S 2.36.405.8 WWE base, Gingerbread 2.3.3 android
  • bravia engine
  • NEW Sense 2.1
  • Rooted
  • Available Freqs: CPU interactive, smartass, powersave, ondemand, and many more
  • CRT TV Lockscreen Animation
  • Data2ext
  • Lockscreen app Sense 3.0 (Kingdom)
  • Iconfix-v1
  • USB Menu Sense 3.0
  • Videocamera 720p FULLY WORKING, by snq-
  • Wake UP from Trackpad
  • Power controls in notification bar.
  • Soporte CIFS.
  • Adobe Flash 10.3
  • Supports VPN
  • Supports ext4
  • Car Home
  • List Host block & list apn
  • Superuser Permissions 2.3.6.1 by ChainsDD
  • Busybox
  • Disabled Boot Sound HTC.
  • Zipaligned
  • odexed.
  • Supported Languages: English, Chinese, Arabic (no completo), Czech, German, Espanol, French, Italian, Dutch, Polish, Russian, Norwegian, Japanese, Korean, Greek, Swedish, Danish, Portuguese, Finnish, Vietnamese, Thai
If you find all above features are useful then follow the following mentioned Pre-Requisites before updating your HTC device.

Pre-Requisites
  • It is highly recommended to back up all your data on SD Card before applying changes because during the process your data may be damage and corrupted. Use Astro File Manager to Backup your data.
  • Disable all Firewall/Anti-Virus Apps installed on your device.
  • Charge your device upto 60% to avoid from unexpected shutdown.
  • Enable USB Debugging Mode on your device, head to SettingsàApplicationsàDevelopmentàUSB Debugging.
  • Your HTC Desire should be rooted before applying this firmware on your phone.
Disclaimer:-Neither we nor the developers are responsible for any mis-happen to your Android phone. This update id only for HTC Desire device, don't use it on any other device. Try it at your risk.

How to Update HTC Desire with Alex v1.8 Custom ROM Firmware
  • First of all, Download Alex v1.8 Custom ROM Firmware and Radio package in your computer.
  • Now connect your device with computer and move both the downloaded packages in the root folder of the SD Card.
  • After it, Disconnect your phone from computer and turn it off to enter into Recovery Mode.
  • To get into Recovery Mode, Press both the Volume Keys and holding these keys press Power button.
  • Once you are in Recovery Mode, select Install Zip from SD CardàChoose Zip from SD Card and then select Alex Custom Firmware. After it select Radio.
  • Now it will take 4-5 minutes to complete the process. Once its done, you will be on Recovery Mode.
  • In Recovery Mode, select Wipe Data/Factory ResetàWipe Cache Partition and then select Reboot System Now.
Note:- Your device will take longer time than the normal start up time. If it doesn’t display home screen within 3-4 minutes and try it by re-inserting the battery in it.
   
That’s it! Now you have successfully updated your HTC Desire with Alex v1.8 Custom ROM Firmware.  If you have encountered with any problem during the process then mention it in the comments section also share reviews about the article.
read more...

Thursday, May 10, 2012

How to Officially Update Samsung Galaxy S2 GT I9100 with Latest Android XXLP2 ICS v4.0 Firmware


Now Samsung Galaxy S2 GT I9100 users can juice up their device with latest Android ICS v4.0 dubbed as XXLP2. This is official update launch by Samsung itself. So, you don’t have to root your device to update it.. But in case if you already rooted your device then after updating your device, rooting access will be revoked. This update will only work on Samsung S2 GT I9100 smartphones not on GT I9100G. Below is the list of all the Pre-Requisites and the important information that you must agree before applying changes.
Pre-Requisites
  • Download ICS XXLP2 Android v4.0 Update Package in your computer from here.
  • It is recommended to backup your important data before applying changes. Use Astro File Manager for backing up your data.
  • Disable all Firewall/Anti-Virus apps installed on your phone.
  • Charge your device upto 60% to avoid from unexpected shut down.
  • Rooting access will be revoked after applying the changes.
  • Enable USB Debugging mode on your device through SettingsàApplicationàDevelopmentàUSB Debugging.

Disclaimer:-Neither we nor the developers are responsible for any mis-happen to your Android phone. Try it at your risk.

How to Officially Update Samsung Galaxy S2 GT I9100 with Latest Android XXLP2 ICS v4.0 Firmware
  • Extract the downloaded package and a password will be prompted. In the password window, type “android” without quotes.

  • Now Turn Off your phone and enter in Download Mode by Pressing the Volume Down Key+Centre button and holding both buttons simultaneously press Power button. If all has done correctly then Green Robot will display on the screen.

Note: If something goes wrong then in spite of moving further try to get it. Don’t proceed to next step till your device isn’t in Download Mode.
  • Once you have entered in Download Mode, open Odin.exe file in your computer. Keeping this file opened connect your device with computer.
  • After loading all the drivers, ID: COM field will turn yellow, indicating you can proceed to next step now.
  • In Odin window, click on the below mention buttons and browse corresponding files.

PIT – u1_02_20110310_emmc_EXT4.pitPDA –  I9100_CODE_I9100XXLP2_CL57619_REV02_user_low_ship.tar.md5,Phone – MODEM_I9100XXLP1_REV_02_CL1095381.tar.md5CSC – GT-I9100-MULTI-CSC-OXALP2.tar.md5 
  • Once all done, click on Start button to start updating the process. When it finished, your phone will restarted.
  • After restarting your device, turn it off and enter into Recovery Mode by pressing and holding both volume keys and Power button simultaneously.
  • In Recovery Mode, select Wipe Data/Factory ResetàWipe Cache Partition and then Reboot System Now.

That’s it! Now you have successfully updated your device with Android XXLP2 ICS v4.0 Firmware. To check it, go to SettingsàAbout PhoneàFirmware Version. If it is XXLP2 Android 4.0.3 Firmware then its OK otherwise you have done mistake.

If you have encountered any problem then mention it in comments section and also share your reviews about the post.
read more...

Wednesday, May 9, 2012

How to Update HTC Rezound with Official Android ICS v4.0 Firmware


In Earlier Posts, I had covered an article to Update HTC EVO3D CDMA with Latest Android ICS v4.0 Firmware. This time HTC has officially launched the Android ICS v4.0 Firmware for HTC Rezound smartphone. Many of the HTC Rezound users were waiting for this update. Now with the release of latest Android Firmware for HTC Rezound device this wait seems to over. This update will not only add new functions in your smartphone but will also enhance your Android experience with new easy to use UI. Here is the list of all new functions, pre-requisites and rooting information that you should learn before applying this update.
Change-Log with Official Android ICS v4.0
  • Lock screen shortcut settings separated from launcher bar shortcuts
  • 3G/4G icon displayed prior to entering decryption password
  • Hidden menu (*#*#4636#*#*) removed
  • Messages application – wrong sender displayed on occasion
  • IPv6 solicitation timer value change
  • New radios

Pre-Requisites and Rooting Information
  • It is highly recommended to back up all your important data to SD Card before applying changes because the data may damage or corrupted during the installation process. Use Astro File Manager to Back up all your data.
  • Disable all Firewall/Anti-virus apps installed on your HTC device.
  • Charge your device upto 60% to avoid from unexpected shutdown during the process of installation.
  • Enable USB Debugging mode on your device from SettingsàApplicationàDevelopmentàUSB Debugging.
  • There is no need to Root your device first to update it with latest ICS v4.0. If your device is already rooted then after applying changes all the rooted access will be revoked.
Disclaimer: We are not responsible for any mis-happening to your phone during the up-gradation, try it on your own risk. 

How to Update HTC Rezound with Official Android ICS v4.0 Firmware
  • First of all, Download Latest ICS Package on your computer from here. If this link is not working you can try mirror link.
  • After downloading the package rename it as PH98IMG not as PH98IMG.zip if you are on Windows Operating System.
  • Once its done, connect your Android device with computer and move the renamed package to the root folder of the SD Card.
  • After it disconnect your device and turn off it.
  • Now enter into Recovery Mode using Boot Loader by pressing and holding both the Volume Keys and Power buttons simultaneously.
  • In Recovery Mode, navigate to Install Zip From SD CardàChoose Zip From SD CardàDownloaded Package. Use Volume Up and Volume Down buttons to navigate between options and Power Button to select any option.
  • Now it will take 3-4 minutes to update, once it updated you will get back on Recovery Mode Screen. Select ++++Go Back++++ in recovery mode and then Reboot System Now.
  • It will take sometimes to restart your device. Don’t worry if your device doesn’t start in 3-4 minutes. But if isn’t showing home screen within 5 minutes then try to start with re-inserting the battery in it.

Note: If something goes wrong during the installation process, start the upgrading process from the start by re-inserting the battery in our phone.

That’s it! Now you have successfully updated your HTC Rezound with latest ICS v4.0. If you are having any problem during the installation process please mention it in comments section and also share your reviews about the post.
read more...

Tuesday, May 8, 2012

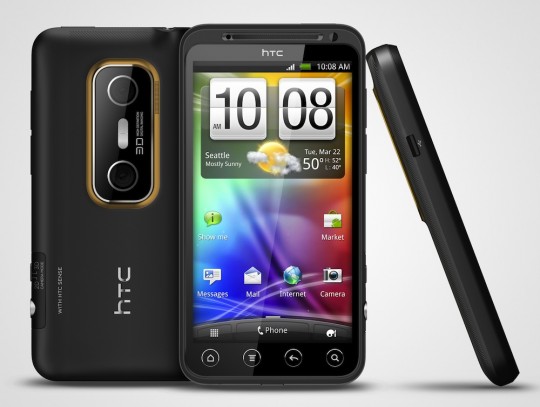
How to Update HTC EVO 3D CDMA with Leaked ICS v4.0.3 Firmware


Many of the big brand manufactures are frequently launching latest android ICS v4.0 on their devices. HTC has planning to release ICS v4.0.3 Firmware on their HTC EVO 3D CDMA smartphone but some folks have released its RUU leaked version. As it not an official update for HTC EVO 3D CDMA, but it won’t require to root your HTC device. Remember this update is not for GSM android phone but if you are willing to test it on your HTC EVO GSM mobile then try it at your own risk. We will not be responsible for any mishappen to your phone.

Leaked version of ICS v4.0.3 for HTC EVO doesn’t have any bug, it works fine as any other HTC update do. Release date of its final version is not specified yet but if you desperately want to update your HTC EVO CDMA smartphone then do follow the following pre-requisites and update guide.

Pre-Requisites and Rooting Information
  • During the update process, data stored on the device may corrupt or damage. So it is highly recommended to back up of all your data before applying this update. Use Astro File Manager to backup your data.
  • It is recommended to charge your android device up-to 60% to avoid unexpected shut down during the installation.
  • Enable USB Debugging mode on your device from the path SettingsàApplicationsàDevelopmentàUSB Debugging.
  • Disable all Antivirus/Firewall apps installed on your HTC device.
  • Remember this update will not root your device.
  • If you have already rooted your HTC device then after applying this update will the rooting access will be revoked.
How to Update HTC EVO 3D CDMA with Leaked ICS v4.0.3 Firmware
  • First of all, download leaked ICS 4.0.3 Package on your computer from here.
  • Now connect your device with the computer and place downloaded package in the root folder of the SD card.
  • After this disconnect your device from computer and shut down your smartphone.
  • Now enter into Recovery Mode by holding and pressing the both volume keys and power button together. In Recovery Mode, Use Volume keys to go on next option and Power Button to select the option.
  • In Recovery Mode, navigate to Install Zip From SD CardàChoose Zip from SD Card and then select the ICS Downloaded Package.
  • Now the update process will start and it will take maximum of 5 minutes to complete.
  • Once the update is successfully applied select ++++Go Back++++ button in Recovery Mode and choose Reboot System Now. Remember it will take some time to re-start your HTC device to apply changes. So, don’t worry if it doesn't start in 2-3 minutes.
Note:- If your devices doesn’t start within 3-4 minutes then re-insert the battery in it and if there is any problem occurs during the installation then also re-insert the battery to start the process from starting.

That’s it! You have now successfully updated your HTC EVO 3D CDMA with latest Android ICS v4.0.3. If you have any problem during the installation process then mention it in the comments section and also give your valuable suggestion about the article.
read more...

Sunday, May 6, 2012

How to Update Motorola Cliq 2 with Official Gingerbread 2.3 Firmware


Earlier, Motorola Cliq 2 was equipped with Android Froyo 2.2 OS. Now after one year it has blessed with new Gingerbread 2.3 update. But the Motorola Cliq 2 owners will not be able to update its OTA. Motorola has officially launched Gingerbread 2.3 for Motorola Cliq 2 which can be download via Motorola Software Update and once the device is upgraded to new OS, users won’t be allow to downgrade their device. Here is the detailed list of all pre-requisites and simple instructions to upgrade your Motorola Cliq 2 device.

Change Log for Android Gingerbread 2.3 for Motorola Cliq 2:
  • Improved Cursor Control
  • Improved Word Selection and Copy
  • Number and Symbol Shortcuts
  • Sleep Mode
  • Dock Icon Functionality
  • App Groups
  • Rich Location App
  • App and Power Management Details
  • Download Manager App
  • New User Interface Icons
  • Tasks App Enhancements
  • Browser Search Engine
  • Emergent Groups and Smart Contacts
  • Updated Calendar Options
  • Device Control Capabilities Through 3LM
  • UI performance Improvements
  • Battery Fixes
  • Wi-Fi Calling Implemented fixes to improve reliability.
  • Wi-Fi Hotspot Signal Improved

Disclaimer: We are not responsible for any mis-happening to your phone during the up-gradation, try it on your own risk. This Update is strictly only for Galaxy Nexus i515 don’t try on other android devices.

Pre-Requisites
  • Back Up of all your important data like contacts, messages, bookmarks, files etc because if something went wrong all your data will be safe. Recommended use Astro File Manager to back up your data.
  • Charge your device upto 60% to avoid unexpected shut down during the installation.
  • Disable all Firewall and Antivirus apps installed on your device.
  • Enable USB Debugging Mode on your dvice from the path SettingsàApplicationsàDevelopmentàUSB Debugging.

How to Update Motorola Cliq 2 with Official Gingerbread 2.3 Firmware
  • First of all, go to the MotorolaSoftware Update page and check mark on the Step 3 box I have read Step 3 to enable download button.
  • Now download and install MSU on your computer system.
  • Once its done, open the application and connect your Motorola device with your computer.
  • In some seconds, the device will be installed on your computer along with all its drivers. Now follow the simple on screen instructions provided by the MSU tool.
  • Once it updates your device’s Firmware, disconnect your phone and check its status from SettingsàAbout Phone. If you see the version 2.0.87, this means you have successfully updated your Molorola Cliq 2 device.

Note: If something goes wrong during the installation process, start the upgrading process from the start by re-inserting the battery in our phone.

That’s it! Enjoy Gingerbread 2.3 OS on your Motorola Cliq 2 smartphone. 
read more...

Saturday, May 5, 2012

How To Update Galaxy Nexus i515 with Official Android ICS 4.0.4 IMM76K Firmware

Verizon Wireless has officially launched the update ICS 4.0.4 IMM76K Firmware for their smartphone Galaxy Nexus i515. This new update has launched to fix all network related issues and bugs of Nexus i515. This update is for both CDMA and LTE variants. Currently this update is only available for such users who are using Galaxy Nexus i515 on any Custom Rom Firmware but if you are on any stock or official firmware then you will get this update OTA from Verizon Wireless very soon. Android 4.0.4 brings lot of performance improvements and stability fixes, so it seems to be an interesting update for Galaxy Nexus i515 smartphone.
Change Log for Android 4.0.4 ICS IMM76K for Galaxy Nexus i515:
  • Reduced ‘Time Lag’ in application shifts
  • Optimized Battery for better performance
  • Fixed Camera bug related to shutter lag
  • Camera from lock screen now loads faster
  • Faster renders on 3D apps
  • Fixed animation issues with some apps
  • Much more fluid (smooth) user interface
  • The same kind of Ringtones as the earlier version
  • Updated Kernel but the version is the same as the old one
  • Some apps like Launcher and Games would still lag.
Pre-Requisites
  • Back up of all your important data messages, contacts, photos, files etc. Recommended use Astro File Manager for it.
  • Charge your Galaxy Nexus upto 60% to avoid unexpected shut down during the installation.
  • Disable all Antivirus/Firewall apps installed on your device.
  • USB Debugging mode must be enabled (SettingsàApplicationàDevelopment)
  • There must be CWM (ClockWorkMod) touch based recovery tool installed on your device.
  • It should be Rooted Device.
Disclaimer: We are not responsible for any mis-happening to your phone during the up-gradation, try it on your own risk. This Update is strictly only for Galaxy Nexus i515 don’t try on other android devices.

How To Update Galaxy Nexus i515 with Official Android ICS 4.0.4 IMM76K Firmware

  • First of all download IMM76K Update Package on your computer.
  • Now connect your Galaxy Nexus device to computer via USB and move the downloaded Update Package to the root folder of the SD card.
  • Disconnect and turn of your phone.
  • Now enter into Boot Loader Mode by pressing and holding the Volume (both Volume up and down) and Power buttons together.
  • In boot Loader, Select Recovery Mode. Use Volume keys to go on next option and Power Button to select the option.
  • Now in Recovery Mode, navigate to Install Zip from SD CardàChoose Zip from SD Card and then IMM76K Update Package.
  • Now update process will start. It will take 5-10 minutes to complete.
  • Once the update is successfully completed select ++++Go Back++++ and then choose Reboot System Now to restart Galaxy Nexus smartphone.

Note:- If your devices doesn’t start within 3-4 minutes then re-insert the battery in it and if there is any problem occurs during the installation then also re-insert the battery to start the process from starting.

That’s it! You have successfully applied IMM76K Update to your Galaxy Nexus Android Phone. 
read more...

Sunday, April 29, 2012

How to Update HTC One X with Lee Droid Custom ROM


HTC One X is the quad core HTC smart phone which comes with latest ICS Android 4.0.3 Firmware along with ICS sense 4.0. It will be launched on 6th May in US. The most popular Android developers, Lee Droid has officially released is custom ROM Lee Droid One Extreme ROM for it. One Extreme ROM has lot of features which enhances the user experience with HTC One X.

Features of Lee Droid Custom ROM
  •        Based on HTC_Europe_1.28.401.9 RUU Android 4.0.3 ICS
  •        Stock HTC 2.6.39.4-g6b459dc Kernel (Until i get my hands on some fresh source
  •        Deodexed, Recompressed & Zipaligne
  •        Rooted with the latest Superuser & binary from Chainfire
  •          Persistent ADB enabled
  •          init.d runparts support
  •          Busybox, bash & nano
  •          Sysrw & Sysro binaries
  •          Memory (RAM) App/Service Priority adjustments
  •          Heavily tuned & Optimized
  •          Multilingual – Full WWE locales list
  •          Aroma installer touch UI (Options list below)
  •          Advanced power menu (Thanks to J4n87) > FULL THREAD <
  •          CIFS & nls_utf8 support
  •          Enhanced I/O performance
  •          Ensured Journalism is disabled
  •          Partition mount tuneups
  •          EXT4 filesystem tuneups
  •          SQlite 3 DB vacum on boot
  •          App cached cleaned on boot
  •          Applications zipaligned on boot
  •          Faster application loading times
  •          Lots of bloat removed
  •          System heavily cleaned
  •          Long press home for recent apps
  •          Recent apps button mapped to menu (Thanks to blubbers)
  •          Tweaked network connectivity configurations
  •          Fancy keyboard animations
  •          Up to 15 tabs in the browser
  •          Landscape home screen support
  •          Screen unlock (Spin in) Animation
  •          Fine tuned & lowered autobrightness algorithm
  •          Fully working HTC Sense account login/creation
  •          Stock & battery display
  •          Scrolling caches disabled
  •          Overscroll animations
  •          Sony Bravia engine
  •          Masses of tuneups
  •          LeeDrOiD Bootanimation & audio
  •          LeeDrOiD Wallpapers

Pre-Requisites
  • Boot-loader must be unlock on the HTC One X and there must be CWM (ClockWorkMod) touch based recovery tool installed on your device.
  • It should be Rooted Device.
  • Disable or remove any Antivirus/Firewall app installed on HTC One device.
  • It is recommended to charge your android phone upto 60% to avoid unexpected shut down during installation process.
  • USB Debugging mode must be enabled (SettingsàApplicationàDevelopment).
  • Finally, Back up of all your important data (contacts, bookmarks, files, apps and settings). Remomnded use Astro File Manager for Backing up your data.
Once you have done with all above stuff then start upgrading your HTC device with Lee Droid Custom ROM.

Disclaimer: We are not responsible for any mis-happening to your phone during the up-gradation, try it on your own risk.

How to Update HTC One X with Lee Droid Custom ROM
  • First of all Download Lee Droid Custom ROM on your computer.
  • Now connect your HTC One device to computer via USB and move the downloaded Custom ROM to the root folder of the SD card.
  • Disconnect and turn of your phone.
  • Now enter into Recovery Mode by pressing and holding the Volume and Power buttons together.
  • After getting into Recovery Mode, select Install Zip from SD card and then choose ZIP from SD card.
  • Scroll to ROM file and select it to start the installation process. It will take 5-10 minutes to update your device.
  • Once it completed, Select Wipe Data/Factory Reset and then Wipe Cache Partition. After it Reboot your Device by selecting Reboot System option.
  • The first boot may take sometime, so don’t worry and have patience.

That’s it! You have successfully installed new Lee Droid Custom ROM on HTC One X. If you have encountered any problem during the installation process please mention it in the comments section. 

read more...